 This guide is for homeowners, DIYers, property investors, and contractor-aware consumers who want a practical understanding of bathroom ventilation in U.S. homes. Whether you are replacing a failing fan, correcting a moisture problem, or planning a new installation, the goal is the same: move humid air out of the bathroom and discharge it safely outdoors.
The quick answer is straightforward. A bathroom exhaust fan duct should vent directly outside through a properly sized, well-sealed, and insulated duct run with as few bends as possible. When the duct is poorly routed, undersized, uninsulated, or terminated in the attic, the result is often condensation, mold, peeling paint, and weak fan performance.
Before You Begin: Key Facts About Bathroom Ventilation
 A bathroom exhaust system is designed to remove moisture at the source. Showers and baths release warm, humid air that can linger on ceilings, walls, trim, and framing. Over time, that moisture can damage finishes and create conditions for mold growth, especially in bathrooms with limited natural ventilation.
In most U.S. jurisdictions, bathroom exhaust air must terminate outdoors. It should not discharge into an attic, crawlspace, or other enclosed area. The reason is simple: moist air that is harmless outside becomes a building problem when released into cooler, confined spaces.
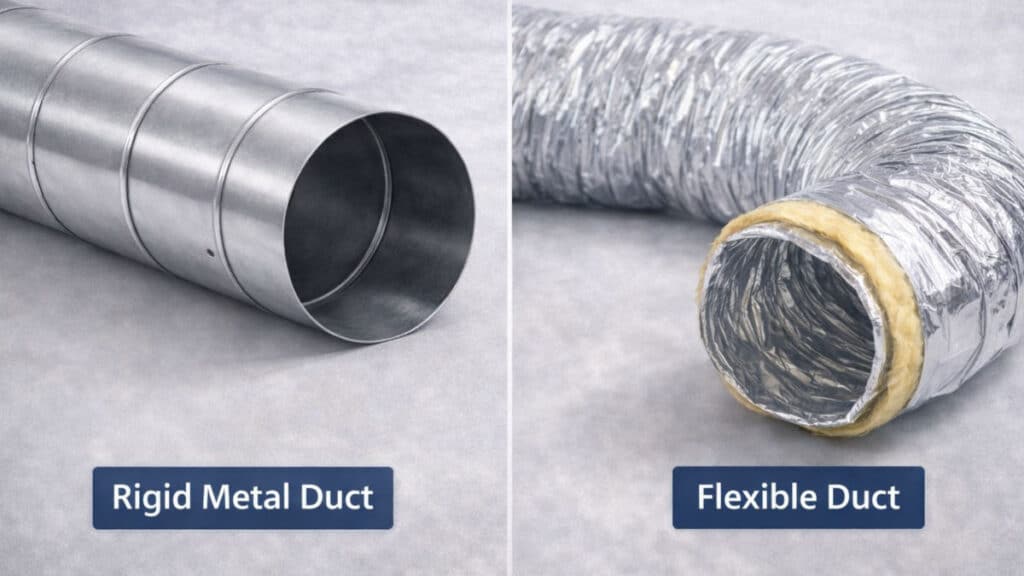
Duct material affects performance more than many homeowners realize. Smooth rigid metal duct is usually the best option because it allows air to move with less resistance. Flexible duct is easier to route around obstacles, but it creates more friction, is prone to sagging, and can trap condensation if not installed carefully.
Duct size also matters. The duct diameter should match the fan manufacturer’s requirements. For instance, many standard bath fans use a 4-inch duct, while higher-capacity units may require 6 inches. Reducing the duct size to fit an opening may seem convenient, but it restricts airflow and can make the fan louder and less effective.
Route design is just as important as material and size. A short, direct path to the exterior performs better than a long run with multiple elbows. Every turn adds resistance. In practical terms, a fan connected to a straight 6-foot run will usually outperform the same fan connected to a 20-foot run with several bends.
Termination location should be chosen with care. Roof venting is common and often makes sense when the fan is near the center of the house. Wall venting can work well when there is a nearby exterior wall. Soffit venting is generally a weak choice because moist air can be drawn back into the attic through nearby intake vents.
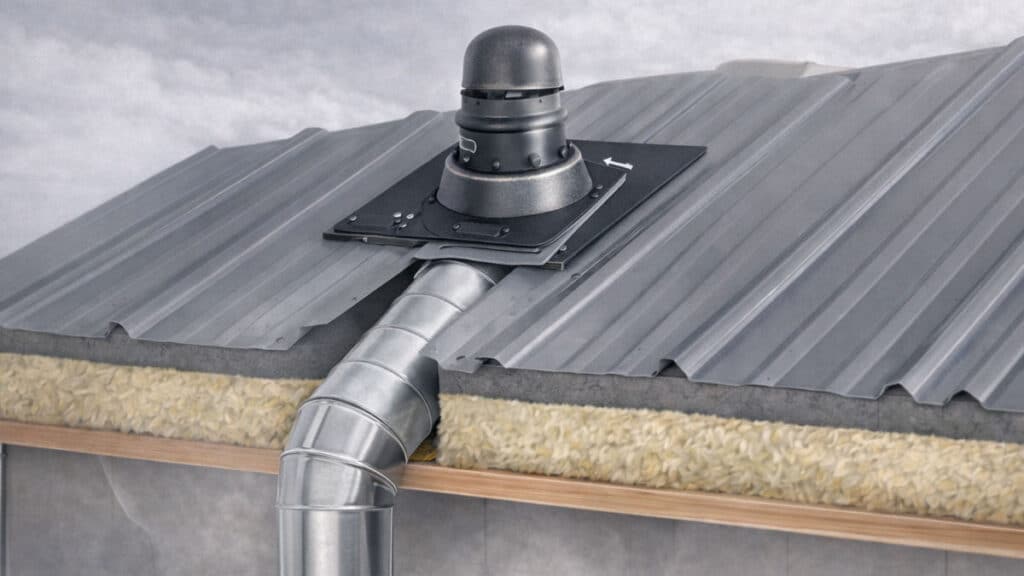
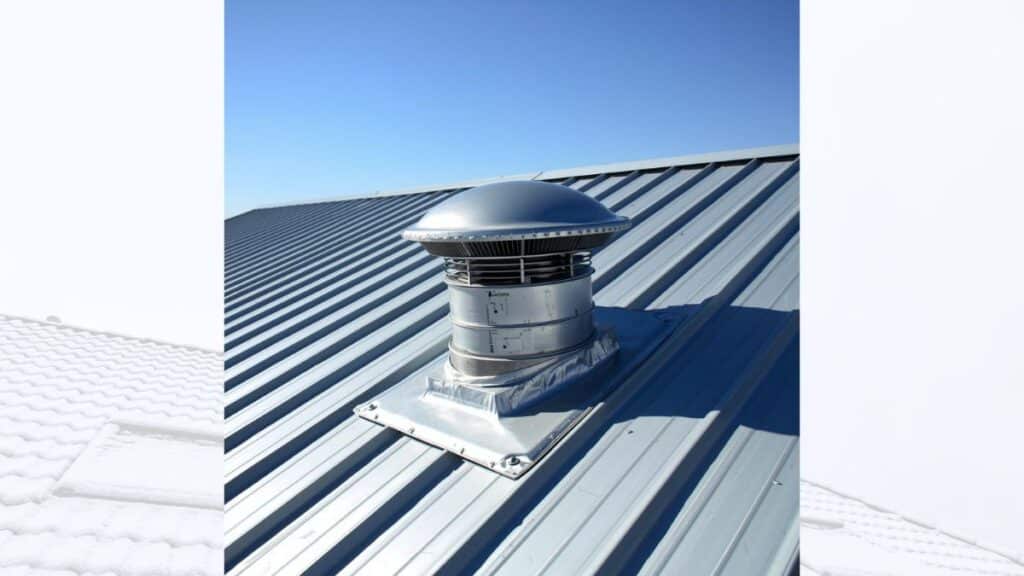
If the home has a metal roof, venting requires extra attention. A bathroom exhaust vent for metal roof installations must use a boot or flashing assembly designed for the roof profile. A vent that works on asphalt shingles will not necessarily seal correctly on corrugated or standing-seam metal panels.
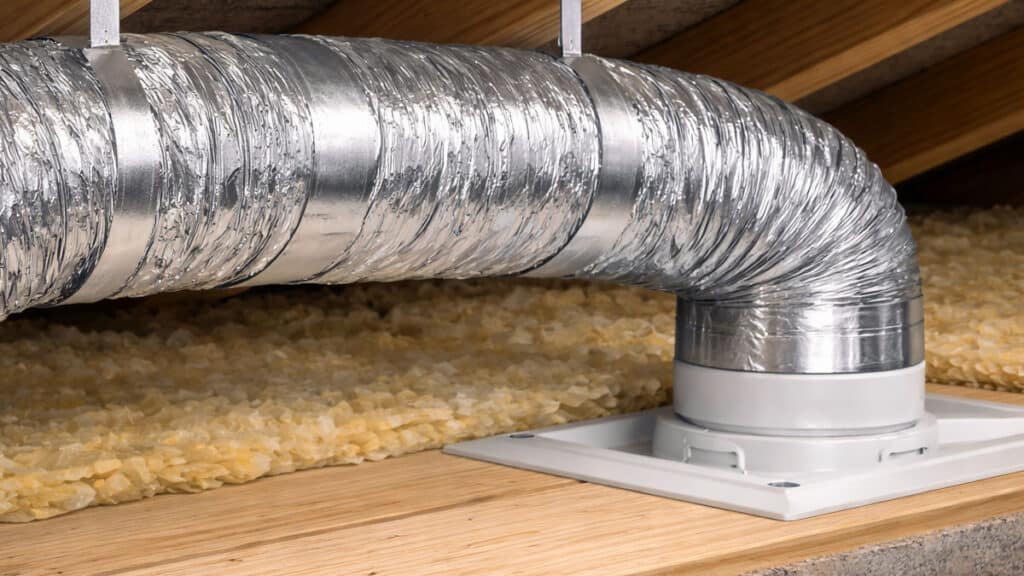
Insulation is essential when a duct passes through an attic or another unconditioned space. Warm, moist air moving through a cold duct can condense into water droplets. Without insulation, that moisture may drip back toward the fan housing and stain the ceiling below.
Tools and Materials Required for Installation
Most bathroom ducting projects require a small set of basic tools. A drill or driver is needed for fastening vent components and supports. A tape measure helps lay out the run accurately, while a level is useful for maintaining proper alignment and slight pitch toward the exterior.
For cutting, you may need a hole saw, jigsaw, or reciprocating saw depending on whether you are opening drywall, roof decking, or exterior sheathing. Tin snips are useful for trimming rigid metal duct and making clean adjustments at fittings and elbows.
On the materials side, rigid metal duct is the preferred choice for most of the run. Matching elbows, couplings, and connectors are needed to join sections securely. You will also need an exterior termination cap, either for the wall or roof, sized to the duct.
Use foil HVAC tape or mastic to seal all duct joints. Standard cloth duct tape is not suitable for this application because heat and humidity cause it to fail over time. Proper sealing prevents air leaks and keeps moisture moving where it belongs, which is out of the house.
If the duct travels through an attic, include duct insulation or insulated wrap. Hangers or support straps are also important because unsupported duct tends to sag, and sagging creates low points where condensation can collect. If the fan housing or vent cap does not include a backdraft damper, add one to prevent outside air from entering when the fan is off.
For roof penetrations, the flashing assembly is not optional. On metal roofs, the vent boot must be compatible with the roof panel shape and installed with the correct sealant and fasteners. This is one of the most failure-prone parts of the job when corners are cut.
How to Install and Route the Duct Properly
Step 1: Map Out the Duct Path and Choose the Vent Location
Begin by identifying the shortest practical route from the fan housing to the outdoors. In most cases, shorter and straighter is better. A direct roof termination may work well for a centrally located bathroom, while a wall termination may be more efficient when the bathroom is near an exterior wall.
Look for obstacles before committing to the route. Ceiling joists, rafters, plumbing vents, wiring, and HVAC components can all affect the layout. It is easier to revise the path at the planning stage than after cutting holes in finished surfaces.
Choose a termination point that will not create secondary problems. A wall cap should not be placed where moist air can drift back through an openable window. A roof vent should be located where flashing can be installed properly and where runoff patterns will not increase leak risk.
For metal roofs, this planning step is especially important. The vent should be positioned where the flashing boot can sit flat and seal well against the panel profile. Poor placement can make even a good vent product difficult to waterproof reliably.
Step 2: Connect and Run the Bathroom Exhaust Fan Duct
 Attach the duct to the fan housing using the manufacturer’s collar or connector. Once connected, seal the joint with foil tape or mastic. This prevents moist air from escaping into the ceiling cavity before it reaches the exterior.
As you run the duct, keep the line as direct as possible. Use elbows only where necessary, and avoid unnecessary offsets. Every extra bend reduces airflow, which means the fan removes less moisture even if it is running at full speed.
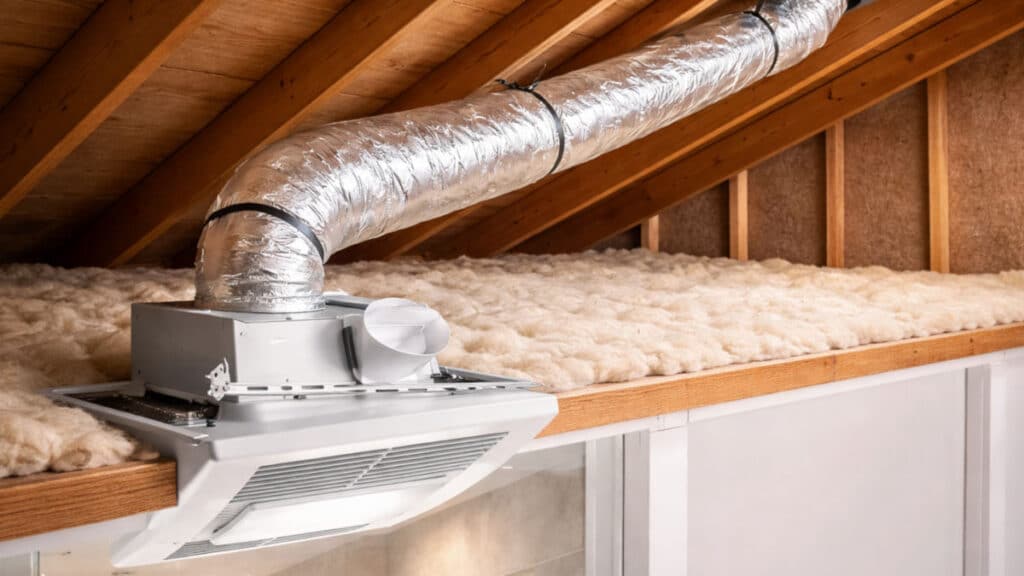
Support the duct at regular intervals so it does not sag between framing members. This is especially important if any flexible section is used. A sagging duct creates low spots that can hold water, which may later drain back toward the fan and cause dripping.
If the duct passes through an unconditioned attic, add insulation after the run is assembled and sealed. This step helps keep the air inside the duct warmer so moisture is less likely to condense on the interior walls of the duct.
Step 3: Install the Exterior Vent and Fully Seal the System
 Cut the opening for the termination cap carefully and confirm that the vent body fits as intended before fastening it permanently. On walls, make sure the cap is level and sealed against the siding or exterior finish. On roofs, the flashing must be integrated correctly with the roofing system.
For shingle roofs, that usually means weaving the upper portion of the flashing under the surrounding shingles. For metal roofs, it means using a compatible vent boot and fastening method designed for the panel type. This is why bathroom exhaust vent for metal roof work often requires more precision than a standard wall vent installation.
Seal the vent assembly and fasteners according to the vent manufacturer’s instructions. Do not rely on sealant alone to compensate for poor flashing or a poorly fitted opening. Sealant is a supplement to proper detailing, not a substitute for it.
After the exterior vent is installed, test the system. Turn the fan on and check for steady airflow at the termination point. If the airflow feels weak, inspect the route for crushed duct, loose joints, or excessive bends. A properly installed system should exhaust air clearly and consistently.
Common Installation and Venting Mistakes to Avoid
The most common error is venting into the attic instead of outdoors. Homeowners sometimes do this to avoid cutting through the roof or wall, but the convenience is temporary. The moisture released into the attic can wet framing, compress insulation performance, and create mold conditions over time.
Another frequent problem is overusing flexible duct. While flexible duct may seem easier to install, long runs tend to sag and restrict airflow. In real homes, this often leads to a fan that sounds like it is working but does not clear steam effectively after a shower.
Improper sealing is another avoidable mistake. If joints are loosely fitted or taped with the wrong product, humid air can escape into the ceiling or attic before reaching the exterior. That hidden leakage can cause moisture damage even when the duct technically vents outside.
Skipping insulation is a common cause of cold-weather performance issues. Homeowners often notice water dripping from the fan grille in winter and assume the roof is leaking. In many cases, the real issue is condensation forming inside an uninsulated duct in a cold attic.
Placement mistakes also matter. A vent cap located too close to windows, soffit vents, or roof features can cause moist air to re-enter the home or create maintenance issues. Good ventilation is not only about moving air out. It is also about keeping that air from coming back in.
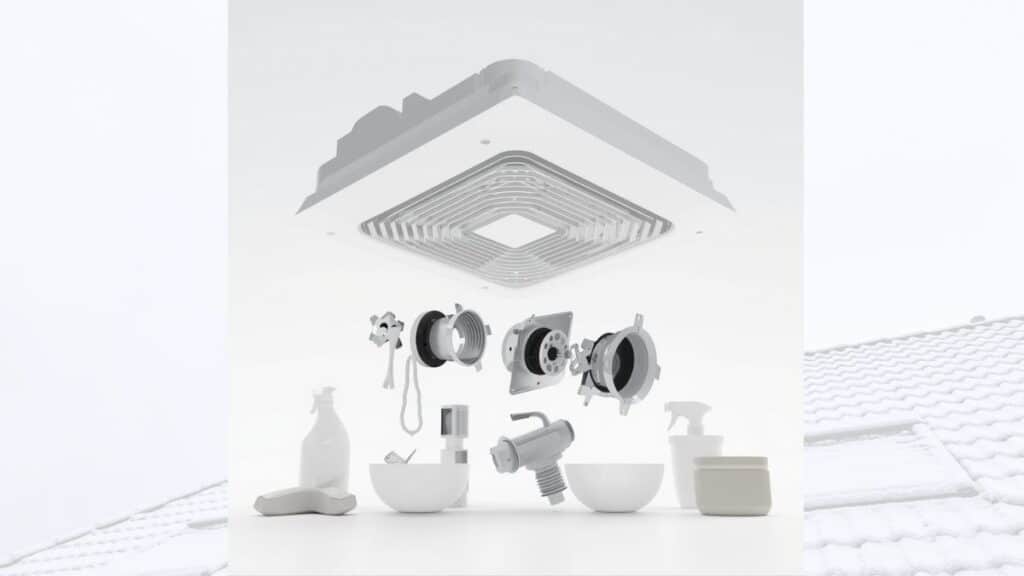
Maintenance is often overlooked as well. Exhaust fan bathroom cleaning is part of keeping the whole system effective. Dust buildup on the fan grille, housing, and blower wheel can reduce airflow and strain the motor, even when the duct itself is installed correctly.
Safety Guidelines and Building Code Considerations
At a high level, bathroom exhaust systems must vent outdoors, use properly sized duct, and follow the fan manufacturer’s installation requirements. Local codes may vary, but these principles are broadly consistent because they address moisture control, energy performance, and occupant safety.
Duct length should be evaluated carefully. Many fan manufacturers provide a maximum equivalent duct length, which accounts for both straight runs and fittings. This matters because an oversized run can reduce airflow enough that the fan no longer performs as rated.
Backdraft protection is another basic requirement. A damper helps prevent cold air, pests, and outside air from entering the duct when the fan is not operating. If the fan housing includes a damper, verify that it opens and closes freely. If it does not, use a vent cap or inline component that provides that protection.
Electrical safety is part of the job whenever the fan is being replaced or rewired. Turn off power at the breaker and verify that the circuit is de-energized before touching wiring. If the installation involves a new circuit, upgraded controls, or uncertain existing wiring, the work should be evaluated against current electrical requirements.
Roof work introduces fall risk as well as leak risk. Use stable ladders, avoid wet or windy conditions, and do not treat a simple vent installation as a low-risk task just because the opening is small. One misplaced cut or one poorly flashed fastener can create a long-term building problem.
For metal roofs, compliance and weatherproofing go together. The vent assembly must be appropriate for the roof type, and the fastening pattern and sealant must match the manufacturer’s recommendations. A correctly selected vent matters because metal roofing expands, contracts, and sheds water differently than asphalt shingles.
Frequently Asked Questions About Bathroom Exhaust Systems
Can a bathroom exhaust fan vent into the attic?
No. It should vent directly outdoors. Discharging humid air into the attic can lead to mold, damp insulation, and moisture damage to framing and roof sheathing.
What is the best duct material for a bathroom fan?
Rigid metal duct is generally the best choice for most of the run because it allows smoother airflow and is less likely to sag or collect condensation than long sections of flexible duct.
How do you handle a bathroom exhaust vent for metal roof installations?
Use a vent boot or flashing assembly designed for metal roofing. The vent must fit the roof profile, be fastened correctly, and be sealed with products approved for that roofing system.
How long can a bathroom exhaust fan duct be?
That depends on the fan model, duct size, and number of fittings. Check the manufacturer’s maximum equivalent length guidance rather than judging by straight distance alone.
Does a bathroom exhaust duct need insulation?
In unconditioned spaces, yes. Insulation helps prevent condensation inside the duct, which reduces the chance of water dripping back into the fan or ceiling.
How often should the fan be cleaned?
Exhaust fan bathroom cleaning should usually be done at least once a year. In homes with heavy daily use, more frequent cleaning may be needed to maintain airflow and reduce motor strain.
Why is water dripping from the bathroom fan?
The usual cause is condensation inside the duct, not necessarily a roof leak. Uninsulated duct, poor slope, or weak airflow can all contribute to water forming and draining back toward the fan.
Can flexible duct be used for a bathroom exhaust run?
It can be used in limited situations, but it is not ideal for long runs. If flexible duct is used, it should be kept short, pulled tight, and supported properly to reduce sagging and airflow loss.
Is a backdraft damper necessary?
Yes, in most cases. It helps keep outside air, insects, and drafts from entering the home when the fan is off.
Final Advice and When Professional Help Makes Sense
Many homeowners can handle a straightforward replacement or a short, direct duct run, especially when the termination point is accessible and the routing is simple. The key is to treat the duct as part of the ventilation system, not as an afterthought. Good fan performance depends on good duct design.
Professional help is often justified when the project involves roof penetrations, long duct runs, complex routing, or uncertain code requirements. This is particularly true for metal roof work, where flashing details must be correct the first time to avoid leaks.
You should also consider calling a pro if the bathroom already shows signs of mold, recurring condensation, ceiling staining, or failed past repairs. In those cases, the issue may involve more than replacing duct. It may require correcting vent location, fan sizing, insulation, or hidden moisture damage.
For informed decision-making, focus on the fundamentals: vent outdoors, keep the run short and smooth, seal every joint, insulate where needed, and maintain the fan over time. When those basics are done well, a bathroom exhaust system is usually quiet, reliable, and effective for years.