 Introduction
 Introduction
This guide is designed for homeowners, DIYers, property investors, and anyone responsible for maintaining a residential bathroom. If your bathroom stays humid after showers, develops odors, or your fan sounds louder than usual, cleaning is likely overdue.
Exhaust fan bathroom cleaning is a practical maintenance task that improves airflow, reduces moisture buildup, and helps prevent mold. In most cases, the process involves turning off power, removing the cover, cleaning internal components, and restoring the unit.
Most bathroom fans should be cleaned every 6 to 12 months. High-use bathrooms or homes with pets may require more frequent maintenance. Ignoring this task can lead to reduced performance and premature fan failure.
Key Things to Understand Before You Begin
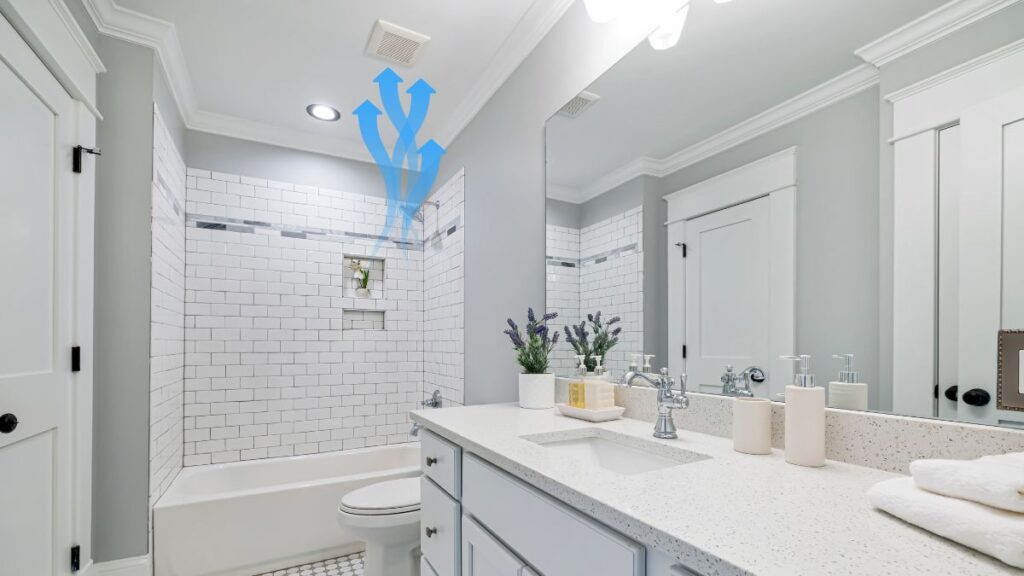
Bathroom exhaust fans remove humid air and vent it outside through ductwork. When dust accumulates on the fan blades or motor, airflow drops and the fan becomes less effective. Even light buildup can restrict performance.
Most U.S. homes use ceiling-mounted fans, often combined with lighting. Some units include humidity sensors or heaters, which require extra caution around wiring. Before starting, identify how your fan is mounted and how the cover is attached.
Accessibility matters. Standard ceiling heights are manageable with a step ladder, but higher ceilings increase risk. Also, understand that cleaning improves airflow but will not fix issues such as damaged motors, blocked ducts, or undersized fans.
Tools and Supplies You’ll Need
Most bathroom fan cleaning tasks require only basic household tools. A stable step ladder is essential for safe access. A screwdriver may be needed depending on how the cover is secured.
A vacuum with a brush attachment is the most effective tool for removing dust from fan blades and housing. Microfiber cloths and mild dish soap are sufficient for cleaning the cover and accessible surfaces.
A soft brush or old toothbrush helps remove debris from tight areas. Optional tools such as compressed air can assist with stubborn dust but should be used carefully.
Wear gloves to protect your hands and a dust mask if buildup is heavy. Safety glasses are recommended to prevent debris from falling into your eyes.
Step-by-Step Guide to Cleaning Your Bathroom Exhaust Fan
Step 1: Shut Off Power and Set Up Your Workspace
Turn off the fan at the wall switch and shut off power at the breaker for added safety. This prevents accidental activation while working inside the unit.
Set up your ladder on a stable surface. Position yourself so you can work comfortably without overreaching.
Remove the fan cover by pulling it down gently. Most covers are held by spring clips. Squeeze the clips to release them. If the cover feels stuck, loosen it carefully instead of forcing it.
Step 2: Remove and Clean the Fan Cover and Housing
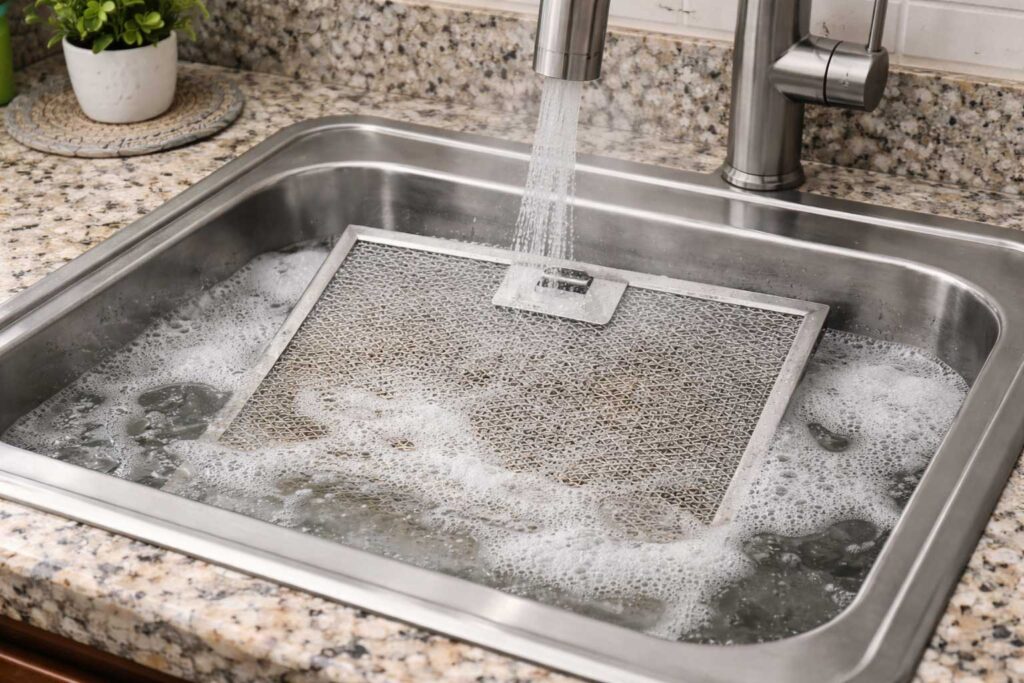
Wash the cover in warm, soapy water. Dust and lint often adhere to the surface, especially in humid environments. Allow it to soak briefly if buildup is heavy, then rinse and let it dry.
While the cover dries, vacuum dust from the fan housing. Focus on corners and edges where debris accumulates. This improves airflow and prevents dust from being pulled back into the motor.
If needed, wipe interior surfaces with a slightly damp cloth. Avoid excess moisture and keep water away from electrical components.
Step 3: Clean the Fan Motor and Blower Components
The fan blades, or blower wheel, are critical to airflow. Dust buildup here reduces efficiency and adds strain to the motor.
Use a vacuum with a brush attachment to remove loose debris. For stubborn buildup, use a soft brush to gently clean the blades. Work carefully to avoid bending components.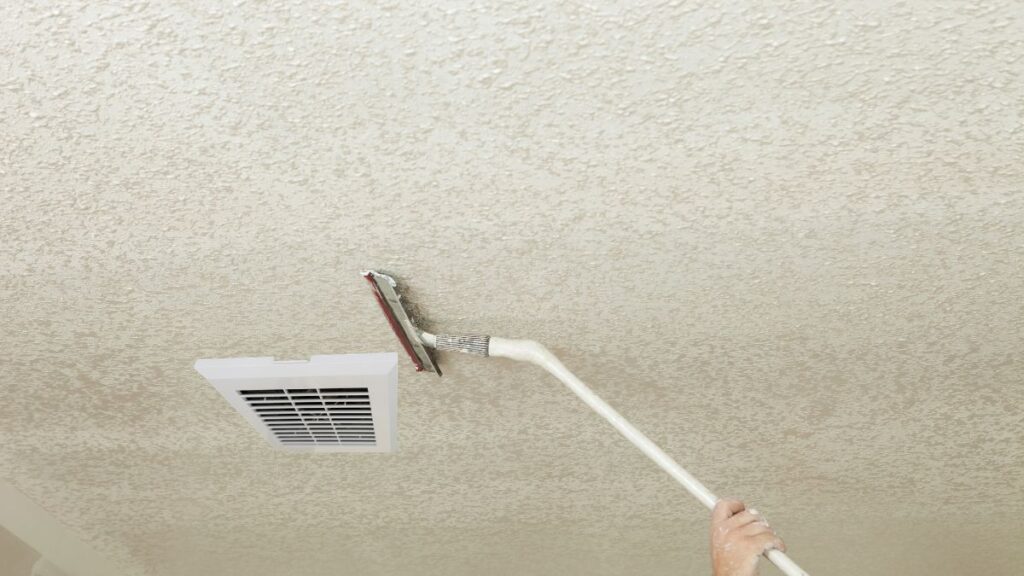
Do not spray cleaner directly onto the motor. If deeper cleaning is needed, use a lightly damp cloth and avoid contact with wiring.
Some models allow the fan assembly to be unplugged and removed. If you choose to do this, note how components are connected before removal.
Step 4: Inspect and Clear the Duct Opening
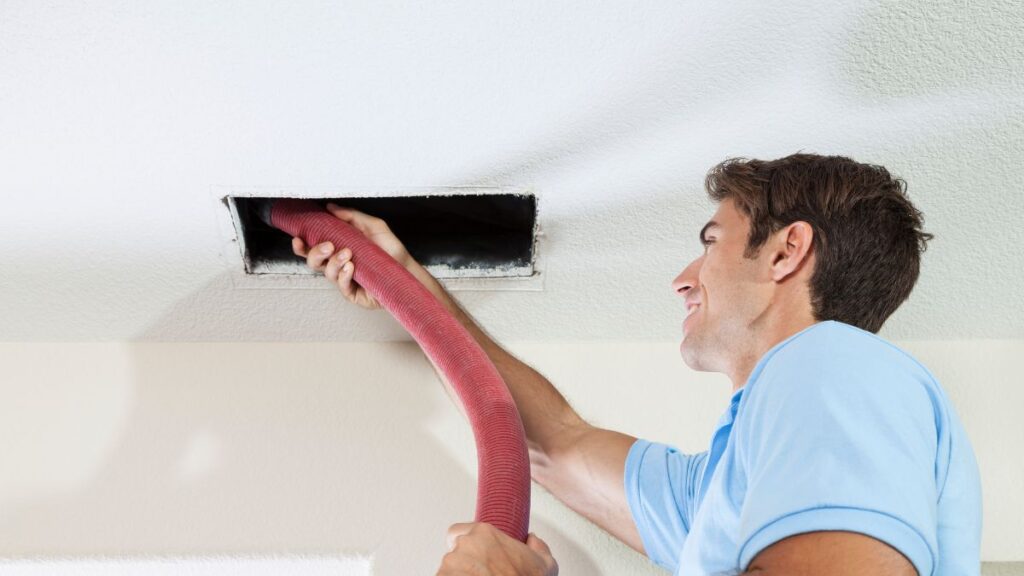
Look into the duct opening using a flashlight. Debris, lint, or insulation can partially block airflow and reduce performance.
Remove any visible obstructions carefully. If airflow has been poor for an extended period, the issue may extend further into the duct.
Flexible ducts can become crushed or disconnected, especially in attic spaces. Also confirm that the fan vents outside. Venting into an attic can lead to moisture damage and mold.
Step 5: Reinstall Components and Test Performance
Once all parts are clean and dry, reinstall the fan assembly if it was removed. Reattach the cover by securing the spring clips into place.
Restore power at the breaker and turn on the fan. Listen for unusual noise and check airflow.
A simple test is to hold a piece of toilet paper near the fan. It should be pulled toward the vent. If airflow remains weak, further inspection may be needed.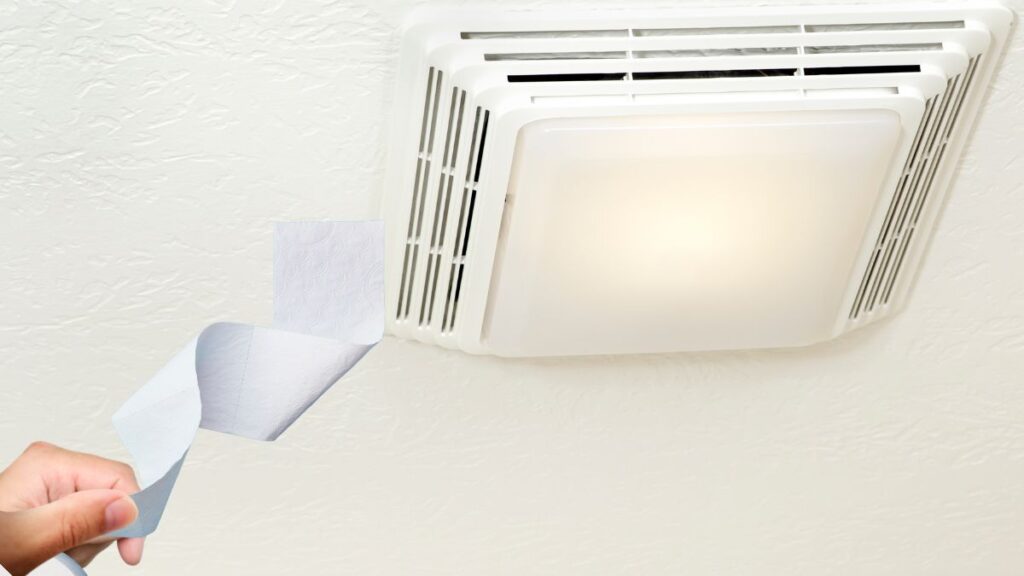
Mistakes to Watch Out for During Cleaning
Cleaning only the cover is a common oversight. Most performance issues come from dust on the fan blades and motor.
Working without turning off power increases risk unnecessarily. Always shut off the breaker before starting.
Using liquid cleaners inside the housing can damage electrical components. Keep moisture controlled and minimal.
Skipping duct inspection is another frequent mistake. A clean fan cannot perform properly if airflow is blocked.
Improper reassembly can cause rattling or reduced performance. Ensure all parts are securely reinstalled.
Safety Guidelines and Code Considerations
Always turn off power at the breaker before working on the fan. This is a basic but critical safety step.
Use a stable ladder and avoid overreaching. Positioning and balance are key to preventing falls.
Bathroom exhaust fans in U.S. homes should vent to the exterior. Venting into an attic or crawlspace can lead to moisture buildup and structural damage.
Typical guidance recommends a minimum of 50 CFM for small bathrooms, with higher capacity required for larger spaces. An undersized fan will not remove moisture effectively.
Duct connections should be sealed, and ducts in unconditioned spaces should be insulated to prevent condensation.
If you encounter exposed wiring, damaged insulation, or signs of overheating, stop and consult a licensed electrician.
Frequently Asked Questions About Bathroom Fan Cleaning
How often should you clean a bathroom exhaust fan?
Every 6 to 12 months is typical, though high-use bathrooms may need more frequent cleaning.
Can I clean a bathroom fan without removing it?
Surface dust can be removed, but proper cleaning requires access to internal components.
Why is my bathroom fan still not working after cleaning?
The issue may be a worn motor, blocked duct, or an undersized fan.
How do you remove a stuck bathroom fan cover?
Pull gently and wiggle it loose. Avoid forcing it to prevent damage.
Is it safe to spray cleaner inside a bathroom fan?
No. Liquids can damage electrical parts. Use a damp cloth instead.
What happens if you don’t clean your bathroom fan?
Dust buildup reduces airflow and can lead to moisture problems and mold.
How long does it take to clean a bathroom exhaust fan?
Most jobs take 30 to 60 minutes depending on buildup and access.
Should landlords or tenants handle bathroom fan cleaning?
Routine cleaning is often considered basic maintenance, but responsibilities depend on the lease agreement.
Final Advice and When It’s Time to Call a Professional
If the fan remains noisy or ineffective after cleaning, the issue may be mechanical. Worn motors or bearings often require replacement.
Electrical issues such as tripped breakers, burning smells, or flickering lights should be handled by a licensed electrician.
Duct problems, including disconnections or improper venting, may require professional inspection, especially if attic access is involved.
Older fans may also benefit from replacement. Newer models are quieter and more efficient, and better suited to modern ventilation needs.
Routine maintenance is the most effective way to prevent problems. Clean the fan regularly, use it during and after showers, and address issues early before they escalate.