 Stand mixers are designed to operate for years with minimal maintenance, but their internal gears still depend on proper lubrication. Inside every KitchenAid stand mixer is a gear transmission packed with thick food-grade grease. Over time that grease can separate, dry out, or slowly migrate away from the gears.
When lubrication begins to degrade, the mixer may run louder, feel strained, or leak oil around the planetary head. These symptoms often appear gradually, which is why many homeowners are unsure when service is actually necessary.
This guide is written for homeowners, DIY users, and property owners who want to maintain their equipment responsibly. It explains how often mixer grease should be replaced, what warning signs to watch for, and what the service process involves. In most households, grease replacement is needed roughly every 5 to 10 years. Heavy use, frequent dough mixing, or long storage periods can shorten that interval.
Key Things to Understand Before Servicing Your Mixer
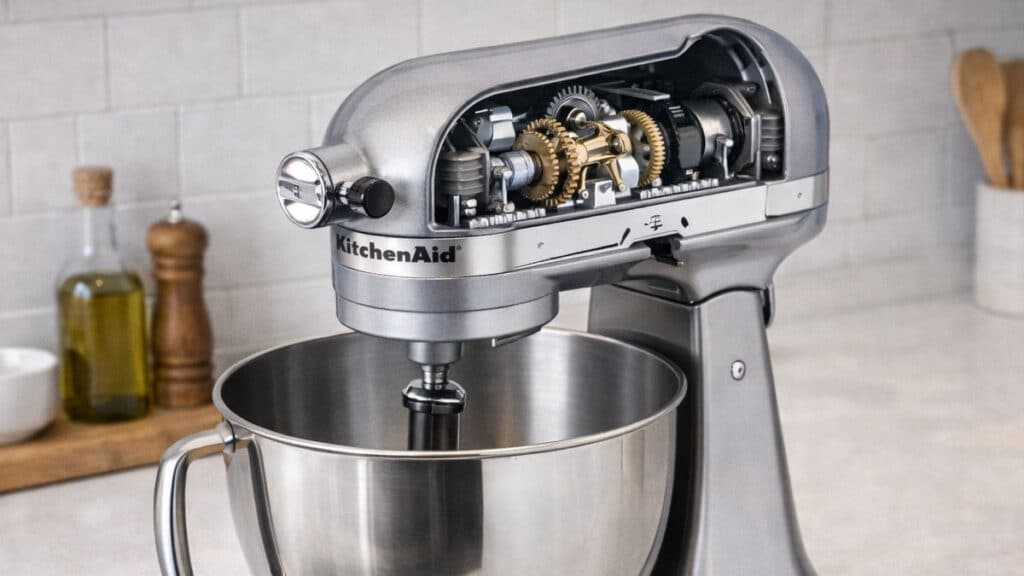
 KitchenAid stand mixers rely on a gear-driven transmission located in the upper housing. Several metal gears transfer motor power to the planetary shaft that rotates the attachments. To prevent wear, those gears are packed with a dense food-grade grease that cushions contact surfaces and reduces friction.
Unlike oil lubrication systems found in some machinery, the mixer’s gearbox is designed to hold grease in place. The lubricant stays packed around the gears while they rotate. This system is simple and durable, but it depends on the grease maintaining its original consistency.
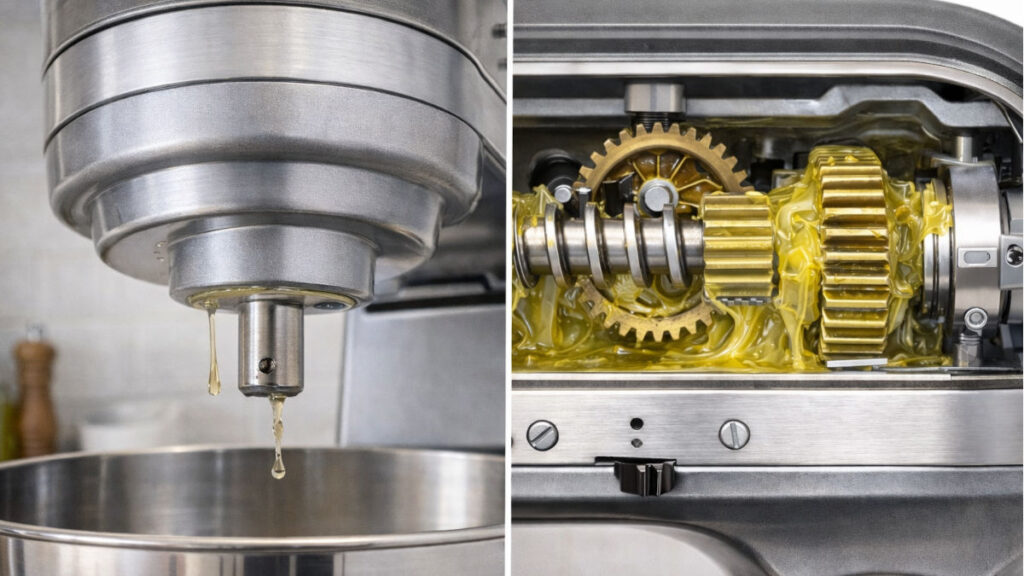
Over time, heat cycles from the motor and normal gear movement can cause the grease to break down. The oil component may slowly separate and migrate downward. When this happens, you may notice oil collecting around the planetary shaft or dripping from the mixer head.
Storage can contribute to the same issue. A mixer that sits unused for long periods allows the grease to settle under gravity. Running the mixer occasionally can redistribute the lubricant, but once separation occurs the grease usually needs replacement.
Usage also affects service intervals. Mixers used for bread dough or stiff batters place heavier loads on the gearbox. These conditions accelerate grease degradation. By contrast, light tasks such as whipping cream or mixing cake batter create far less mechanical stress.
Tools and Supplies Required
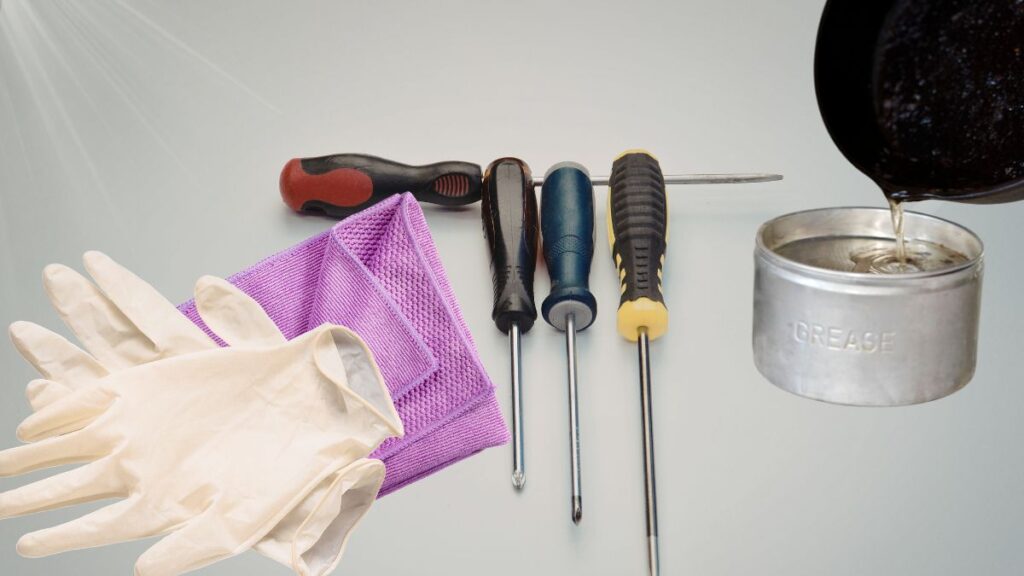
Before opening the mixer, gather the necessary tools and cleaning materials. Having everything prepared helps prevent grease contamination and keeps the process organized.
- Food-grade appliance gear grease designed for stand mixers
- Phillips screwdriver
- Flathead screwdriver or plastic pry tool
- Plastic scraper or putty knife
- Lint-free shop towels or rags
- Small cleaning brush
- Disposable gloves
- Container or tray for discarded grease
Choosing the correct grease is important. Automotive grease or general-purpose lithium grease should not be used because it is not rated for incidental food contact. Food-grade appliance grease is formulated specifically for mixer gearboxes and food preparation environments.
How to Replace the Grease: Step-by-Step Process
Step 1: Disconnect Power and Prepare the Mixer

Begin by unplugging the mixer. Electrical appliances should never be serviced while connected to power.
Remove the bowl and any attachments, then place the mixer on a stable work surface. A sturdy table or workbench provides better control when opening the housing.
Most tilt-head KitchenAid mixers include a decorative trim band around the top housing. Remove the small screw holding the band in place and slide it off. The housing screws that secure the upper motor cover will now be visible.
Remove these screws carefully and set them aside in the order they were removed. Some models use different screw lengths. Mixing them up during reassembly can damage the threads or prevent the housing from closing properly.
Step 2: Open the Gear Housing and Clean Out Old Grease
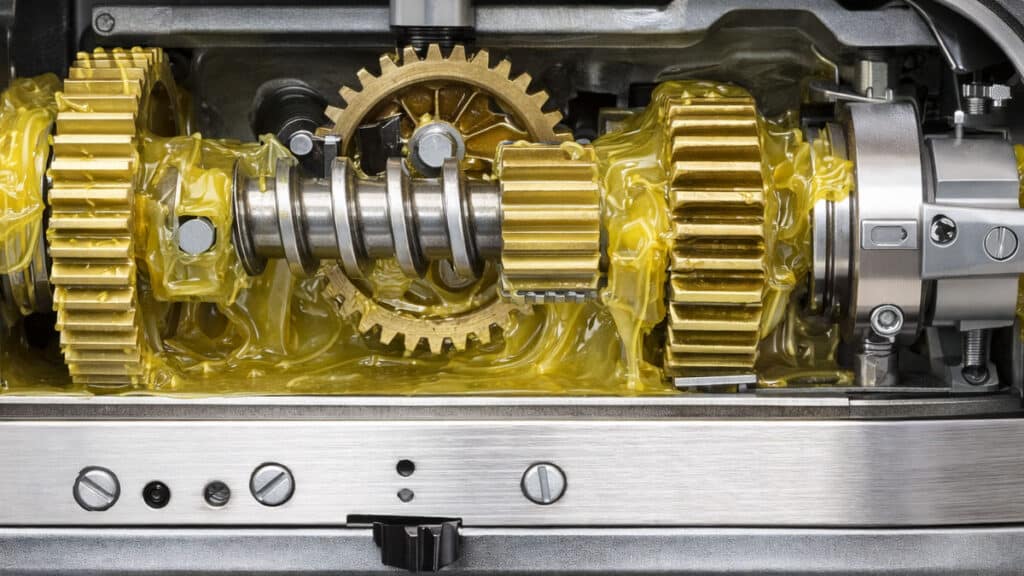
Once the screws are removed, lift the upper housing to expose the gearbox. Inside you will see several metal gears surrounded by thick grease.
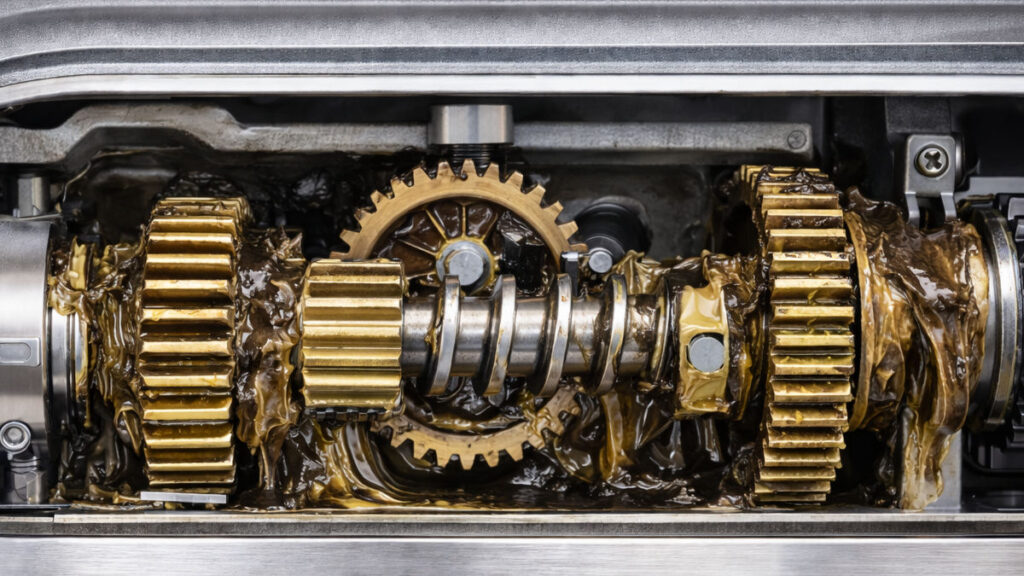
In mixers that require servicing, the grease may appear stiff, dry, or partially liquefied. Sometimes the oil portion has separated and pooled in one area.
Use a plastic scraper and shop towels to remove the old grease. Work slowly so the lubricant does not spread into the motor area. A small brush can help clean grease from gear teeth and tight corners.
While cleaning, inspect the gears closely. Healthy gears have smooth, evenly shaped teeth. If you see chipped edges, uneven wear, or metal fragments in the grease, internal parts may need replacement.
It is important to remove as much degraded grease as possible. Leaving large amounts behind allows the separated oil to mix with the new lubricant, which reduces its effectiveness.
Step 3: Apply Fresh Grease and Reassemble the Mixer

After cleaning the gearbox, apply fresh food-grade grease around the gears. The goal is to coat the gear teeth and surrounding surfaces rather than completely filling the housing.
Overpacking the gearbox is a common mistake. Excess grease can increase resistance and cause the mixer to run warmer than normal.
Rotate the gears gently by hand to distribute the lubricant evenly. This helps ensure all contact surfaces receive grease before the mixer is powered on.
Reinstall the upper housing and tighten the screws in their original positions. Replace the trim band and secure it with its retaining screw.
When the mixer is fully assembled, run it at the lowest speed for about a minute. This allows the grease to settle into the gears. Gradually increase the speed while listening for unusual noises.
Maintenance Errors Homeowners Should Avoid
One frequent mistake is using the wrong lubricant. General automotive grease or multipurpose lubricants are not suitable for food preparation equipment and may damage internal components.
Another common issue is adding too much grease. More lubricant does not improve performance. Excess grease creates drag inside the gearbox and can increase heat during operation.
Some homeowners also skip inspection of the gears during maintenance. Replacing grease without checking gear condition can leave existing mechanical damage unresolved.
Ignoring early warning signs is another problem. Small oil leaks from the planetary head usually indicate grease separation inside the gearbox. Addressing the issue early helps prevent gear wear.
Finally, avoid running the mixer at high speed immediately after reassembly. Starting slowly allows the grease to distribute evenly and reduces strain on the gears.
Important Safety and Appliance Considerations
Although mixer maintenance is a common household task, basic appliance safety practices still apply.
Always unplug the mixer before opening the housing. Internal components include wiring and motor parts that should never be exposed to live electricity.
Keep grease away from electrical components. If lubricant spreads onto wiring or motor windings, it can trap heat and damage the appliance.
Use only food-grade grease that meets NSF H1 standards or manufacturer specifications. These lubricants are designed for incidental contact in food preparation environments.
Avoid modifying internal components. Kitchen appliances sold in the United States typically carry UL safety certification. Altering gears or structural parts can compromise the appliance’s tested safety design.
Finally, perform the work on a stable surface. Stand mixers are heavier than they appear, and dropping the unit during disassembly can damage both the appliance and surrounding surfaces.
Frequently Asked Questions
How often should you change grease in a KitchenAid mixer?
For most households, replacing the grease every 5 to 10 years is sufficient. Mixers used frequently for bread dough or heavy batters may require service sooner. Oil leakage or grinding noise usually indicates the grease has degraded.
How do you lubricate a KitchenAid mixer?
Lubricating the mixer involves opening the upper housing, removing the old gearbox grease, and applying fresh food-grade grease to the gears. This restores proper lubrication and protects the gear system.
What type of grease should be used in a KitchenAid mixer?
A food-grade gear grease designed for stand mixers should always be used. Products labeled NSF H1 are typically appropriate for food preparation equipment.
Why is oil leaking from my KitchenAid mixer head?
Oil leakage typically occurs when the grease inside the gearbox separates over time. The liquid portion drains downward and escapes around the planetary shaft. Replacing the grease usually resolves the problem.
How long does KitchenAid mixer grease last?
In normal household use, the grease can last many years. Service intervals depend on how frequently the mixer is used and whether it handles heavy dough or other high-load tasks.
Is it worth getting KitchenAid mixer maintenance service?
Professional service can be helpful if the mixer has worn gears, electrical issues, or is still under warranty. A technician can inspect the gearbox and replace damaged components if necessary.
Can I use a steam cleaner on kitchen cabinets?
Steam cleaning is generally not recommended for most kitchen cabinet finishes. High heat and moisture can loosen adhesives, soften painted surfaces, or cause wood swelling. A mild cleaner and damp cloth are usually safer.
Practical Maintenance Advice and When Professional Service Makes Sense
Replacing grease is a manageable maintenance task for many homeowners, but the work should be done carefully. Proper cleaning and inspection are just as important as applying new lubricant.
If you discover chipped gears, metal debris, or excessive internal wear, professional repair may be necessary. Gear replacement often requires specialized parts and careful alignment.
Owners of newer mixers should also consider warranty coverage before opening the housing. Manufacturer service may be required to preserve warranty protection.
Regular use can also help maintain lubrication. Running the mixer occasionally during long storage periods helps redistribute grease and reduces separation.
Paying attention to unusual noise, increased resistance, or oil leakage allows problems to be addressed early. With periodic maintenance, a well-built stand mixer can continue operating reliably for many years.