 Intro
Intro
 Intro
IntroThis guide is intended for homeowners, DIYers, and property investors who want to maintain a quieter, more effective bathroom exhaust fan. Excess humidity from daily use can lead to mold, peeling paint, and long-term damage if ventilation is not working properly.
In most cases, increased noise or weak airflow comes from dust buildup, loose components, or a worn motor. Routine cleaning and basic inspection can restore performance. If the unit is older or poorly installed, replacement or duct improvements may be necessary.
What to Understand Before You Begin
 A bathroom exhaust fan is designed to remove moisture and odors from the space. When airflow is restricted, humidity lingers and can damage finishes or contribute to mold growth over time.
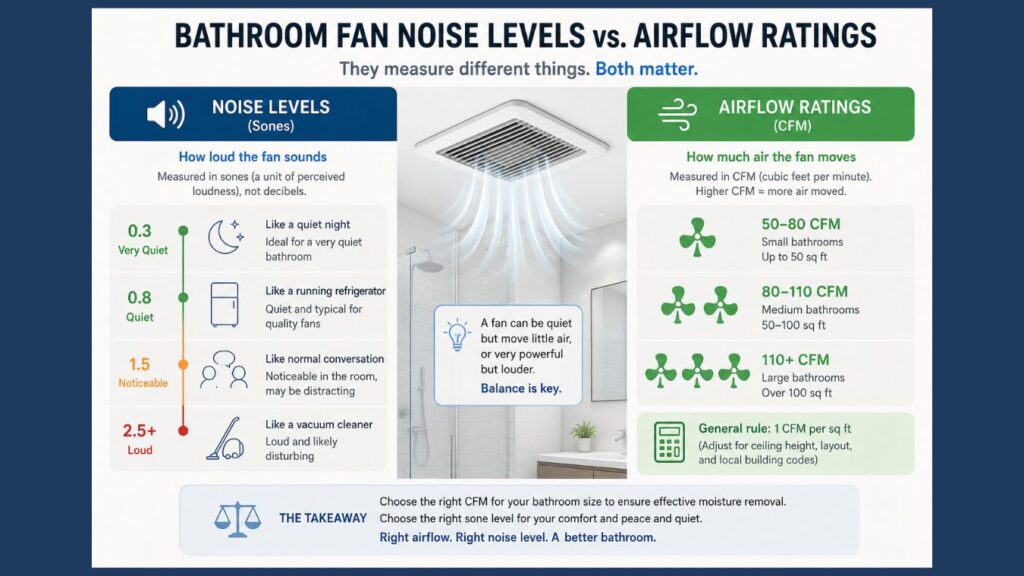
Noise levels are measured in sones. A quiet type fan typically operates below 1.5 sones, while older or neglected units are significantly louder. However, low noise does not guarantee effective ventilation. Airflow capacity, measured in CFM, must match the size of the bathroom.
Most fans last between 8 and 15 years. Cleaning can restore function in many cases, but worn motors or outdated designs may justify replacement. Ductwork also plays a critical role. Poor routing, long runs, or blockages can reduce performance and increase noise even with a newer fan.
Before starting, identify how the fan is powered. Some are controlled by standard switches, while others use timers or humidity sensors. Always confirm power is off before opening the unit.
Required Tools and Materials
 Basic tools are sufficient for most maintenance tasks, but having the right equipment improves efficiency and safety.
- Screwdriver or nut driver for removing the grille and mounting screws
- Vacuum with brush attachment for dust removal
- Soft brush or toothbrush for detailed cleaning
- Mild household cleaner for non-electrical components
- Microfiber cloths for wiping surfaces
- Step ladder for safe ceiling access
- Flashlight for interior inspection
- Non-contact voltage tester to verify power is off
- Replacement motor or fan assembly if needed
- Gloves, dust mask, and safety glasses
Avoid using compressed air indoors, as it disperses dust into the room and can force debris deeper into the motor.
How to Clean and Maintain Your Bathroom Fan
Step 1: Shut Off Power and Open the Fan Housing
 Turn off the fan at the switch, then shut off power at the breaker. Use a voltage tester to confirm the circuit is inactive. This step is essential to prevent accidental shock.
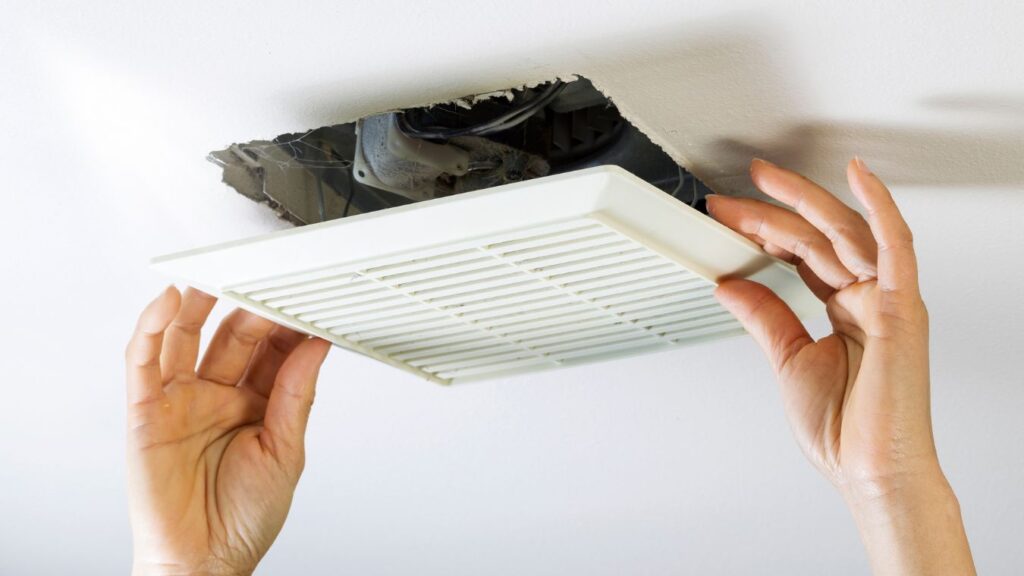
Remove the grille by pulling it downward and releasing the spring clips. Set it aside for cleaning. Inspect the interior of the housing for dust buildup, loose screws, or visible wear.
Step 2: Deep Clean All Fan Components
 Use a vacuum with a brush attachment to remove dust from the motor, fan blades, and housing. Accumulated debris can cause imbalance, leading to vibration and increased noise.
If the motor assembly is removable, disconnect it carefully. Many units allow the motor to unplug from the housing for easier cleaning or replacement.
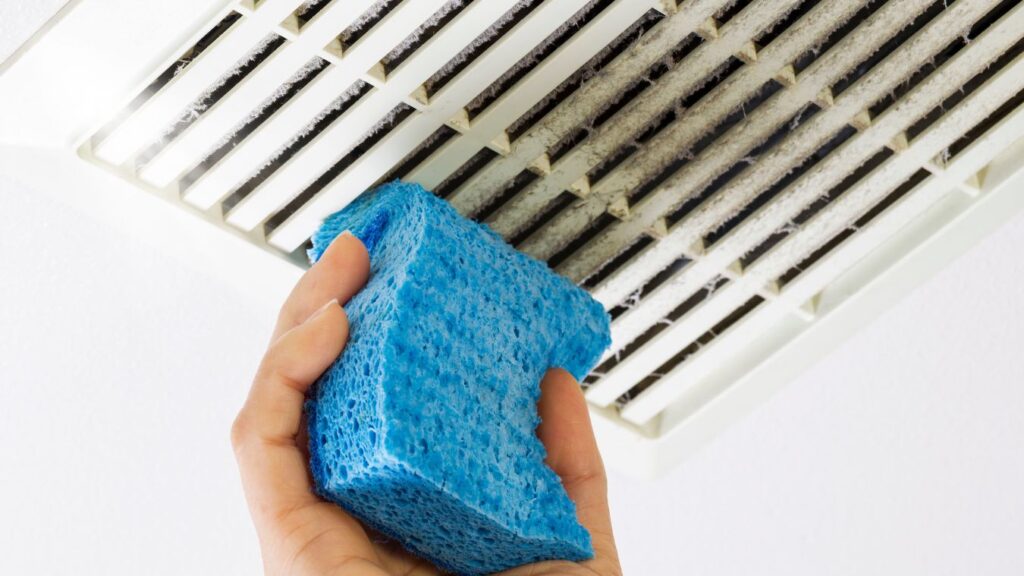
Wash the grille with warm soapy water and allow it to dry completely. A clogged grille restricts airflow and reduces overall efficiency.
Wipe down the fan blades and housing interior with a damp cloth. Avoid saturating electrical parts. Check the duct opening for lint or debris that could obstruct airflow.
Step 3: Inspect, Repair, and Reassemble for a bathroom vent fan quiet type
Examine the motor for signs of wear such as grinding noise or slow startup. These typically indicate failing bearings. In many cases, replacing the motor assembly is more practical than replacing the entire unit.
Tighten all mounting screws. Even minor looseness can transfer vibration into the ceiling structure, increasing perceived noise.
Inspect the duct connection and seal any gaps with foil HVAC tape. Air leaks reduce efficiency and may create whistling sounds.
Reinstall all components, restore power, and test the fan. Airflow should be steady, and operation should sound smoother than before. A simple test is to hold a piece of tissue near the grille and confirm it is pulled upward.
Mistakes That Can Lead to Noise or Poor Performance
A common mistake is assuming a quiet fan does not require maintenance. Dust buildup affects all fans over time and will eventually increase noise and reduce airflow.
Another frequent issue is overlooking ductwork. Even a high-quality fan will perform poorly if connected to a long or restrictive duct system.
Attempting to lubricate sealed motors is also problematic. Most modern units are not designed for lubrication, and doing so can damage internal components.
Improper reassembly is another source of noise. Loose screws or misaligned grilles can create rattling that mimics motor failure.
Exterior vent blockages are often missed. A stuck damper or debris at the outlet forces the fan to work harder, increasing noise and reducing effectiveness.
Safety Guidelines and Code Requirements
Bathroom exhaust fans must vent to the exterior of the home. Venting into attics or crawlspaces allows moisture to accumulate, which can lead to mold and structural issues.
Minimum airflow is typically 50 CFM for small bathrooms. Larger spaces require higher capacity to remove moisture effectively.
Fans installed over showers or tubs must be rated for damp or wet locations. This reduces the risk of electrical hazards.
Electrical connections should follow standard safety practices. In some cases, GFCI protection may be required depending on the circuit and location.
Ducts should be as short and straight as possible. Smooth metal ducts perform better than flexible ones and reduce both resistance and noise.
Insulating ducts in unconditioned spaces helps prevent condensation, which can drip back into the fan or ceiling.
Frequently Asked Questions
Why is my bathroom exhaust fan so loud?
Noise is usually caused by dust buildup, loose components, or worn motor bearings. Restricted airflow can also increase sound levels.
How often should I clean my bathroom fan?
Once a year is typical. In high-use bathrooms, cleaning every six months helps maintain performance.
Can I make my bathroom vent fan quieter without replacing it?
Yes. Cleaning, tightening components, and addressing duct issues often reduce noise significantly.
What is a quiet type bathroom fan?
It refers to a fan with a low sone rating, typically below 1.5, designed for quieter operation.
How do I know if my exhaust fan motor is failing?
Grinding noise, slow startup, or failure to run after cleaning usually indicate motor wear.
Why is my fan running but not removing moisture?
This often points to duct restrictions, leaks, or improper venting to the exterior.
Can I upgrade to a quieter fan without replacing the housing?
Some models allow motor upgrades, but compatibility varies by manufacturer and design.
How much does it cost to replace a bathroom exhaust fan in the U.S.?
Basic replacements typically range from $150 to $400 for straightforward installations. More complex work increases cost.
Final Advice and When to Hire a Professional
 Routine cleaning and basic inspection are manageable for most homeowners. These steps address the most common causes of noise and poor airflow.
Professional help is recommended when electrical issues are present, such as tripping breakers or damaged wiring. These situations require proper diagnosis and repair.
If the fan vents into an attic or requires duct rerouting, the work often involves structural access or exterior modifications. This is typically beyond standard DIY scope.
Persistent noise after maintenance may indicate deeper issues, including poor duct design or structural vibration.
Upgrading to a modern bathroom vent fan quiet type can improve both comfort and moisture control. Proper installation ensures the fan operates as intended and meets code requirements.
Annual maintenance helps extend the life of the fan and keeps bathroom ventilation reliable over time.