 Introduction
 Introduction
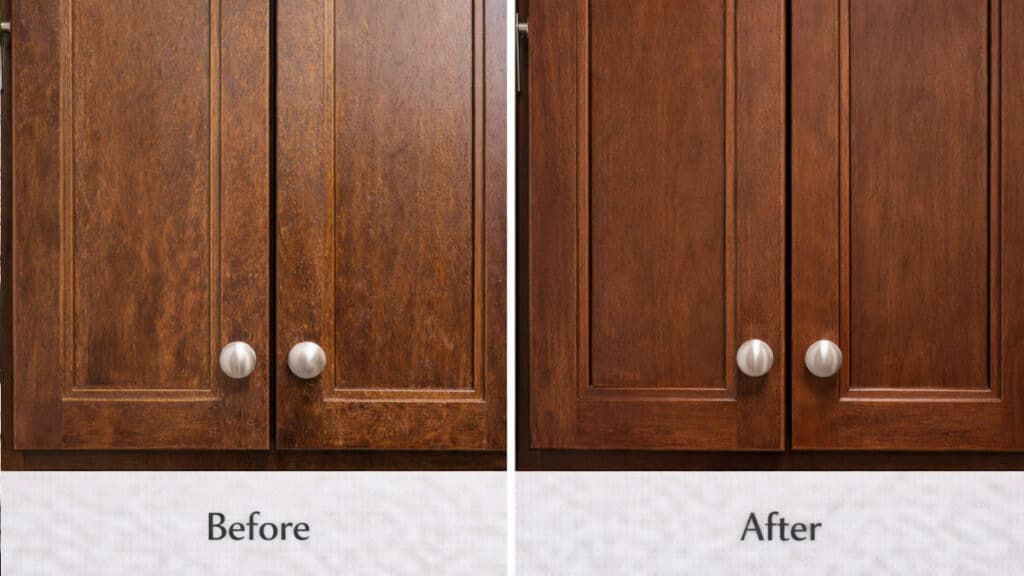
This guide is written for U.S. homeowners, DIY renovators, rental property owners, and contractor-aware consumers dealing with thick, sticky grease buildup on kitchen cabinets. If cabinet doors feel tacky, appear darker near the range, or have lost their original sheen, long-term cooking residue is likely the cause.
In most homes, this buildup develops gradually and goes unnoticed until the surface texture changes. By that point, simple surface wiping is no longer effective. A controlled, staged cleaning process is required. Remove dry debris first, apply a properly diluted degreaser with minimal moisture, allow brief dwell time, gently agitate, rinse thoroughly, and dry immediately. The objective is to dissolve grease without compromising paint, stain, laminate, or engineered wood cores.
When approached methodically, cabinets can often be restored without sanding or repainting. The key is restraint and control rather than aggressive scrubbing.
Key Considerations Before You Begin

Kitchen grease is not ordinary dirt. During cooking, oil particles become airborne and settle on surrounding surfaces. Heat accelerates oxidation, causing oils to harden into a sticky film that traps dust. Over time, that film thickens, particularly above the range and around handles where hands transfer additional oils.
Before cleaning, identify your cabinet material. Painted wood, stained hardwood, laminate, thermofoil, and MDF with factory coatings respond differently to moisture and alkalinity. In practice, most cabinet damage during cleaning is caused by excess water, not insufficient scrubbing.
Inspect the finish closely under good lighting. If paint is peeling, surfaces feel soft, or seams are separating, cleaning will not correct the issue. Those conditions indicate finish failure or moisture intrusion. At that stage, refinishing or replacement may be more appropriate than continued cleaning attempts.
Always test your cleaning solution in a concealed area. Even factory finishes vary in durability depending on age and exposure.
Required Tools and Cleaning Supplies
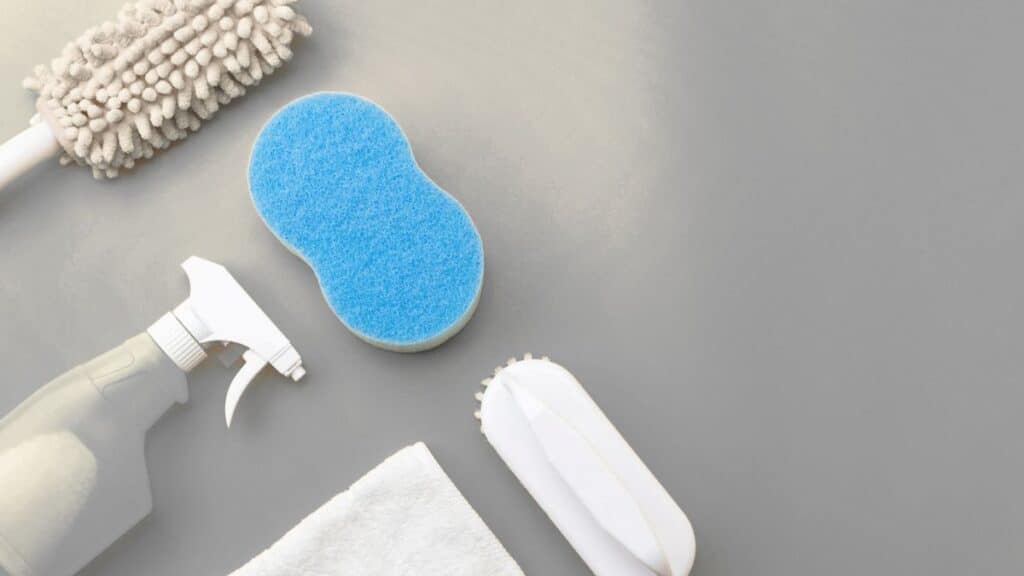
Microfiber cloths are preferable to paper towels because they lift grease while minimizing abrasion. In professional settings, microfiber is standard for finished surfaces for this reason.
You will need warm water, a mild grease-cutting dish soap, and a bucket. A non-scratch scrub pad helps with heavier buildup, but pressure should remain moderate. A soft-bristle brush is useful for detailed panel profiles and around hardware.
Baking soda can be mixed with water to form a mild paste for isolated stubborn areas. For more substantial accumulation, a cabinet-safe degreaser may be used, but dilution is critical. Stronger is not better when working with finishes.
Avoid oven cleaners, undiluted ammonia, or highly alkaline powdered detergents. Dishwasher detergents, including non phosphate dishwasher detergent, are engineered for high-temperature mechanical action. On cabinetry, they can dull coatings and shorten finish life.
Wear gloves during extended cleaning. Use a stable step stool rather than standing on countertops, which introduces unnecessary fall risk.
Step-by-Step Process for Removing Heavy Grease
Step 1: Prepare the Workspace and Remove Loose Debris

Clear countertops and relocate small appliances. Protect nearby surfaces if needed.
Dry dust all cabinet fronts and sides. Pay particular attention to the tops of upper cabinets. In many homes, this is where the heaviest accumulation sits. Wetting this layer before removing loose debris tends to smear grease rather than remove it.
If buildup is thick, vacuum first. Removing dry contaminants reduces the need for aggressive agitation later.
Turn off under-cabinet lighting before proceeding. This avoids unnecessary exposure to moisture near electrical components.
Step 2: Apply Degreaser and Loosen Built-Up Residue
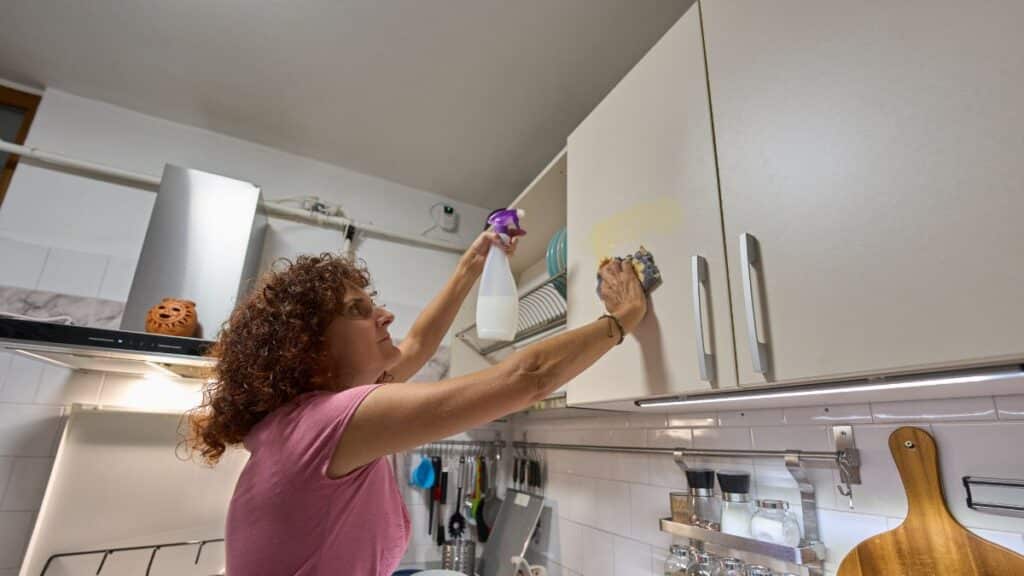
Mix warm water with a small amount of grease-cutting dish soap. The solution should feel slick but not heavily sudsy. Excess soap increases rinsing time and leaves residue if not fully removed.
Dampen a microfiber cloth so it is moist, not dripping. Apply solution to the cloth rather than spraying directly onto cabinets. Controlling moisture at the cloth level significantly reduces the risk of seam infiltration.
Work in small sections. Allow the solution to sit for two to three minutes on heavy areas. This dwell time does most of the work. When grease is properly softened, moderate wiping pressure is sufficient.
For concentrated buildup near handles or above the range, apply a baking soda paste and gently agitate with a non-scratch pad. If grease persists, use a diluted cabinet-safe degreaser and repeat the process.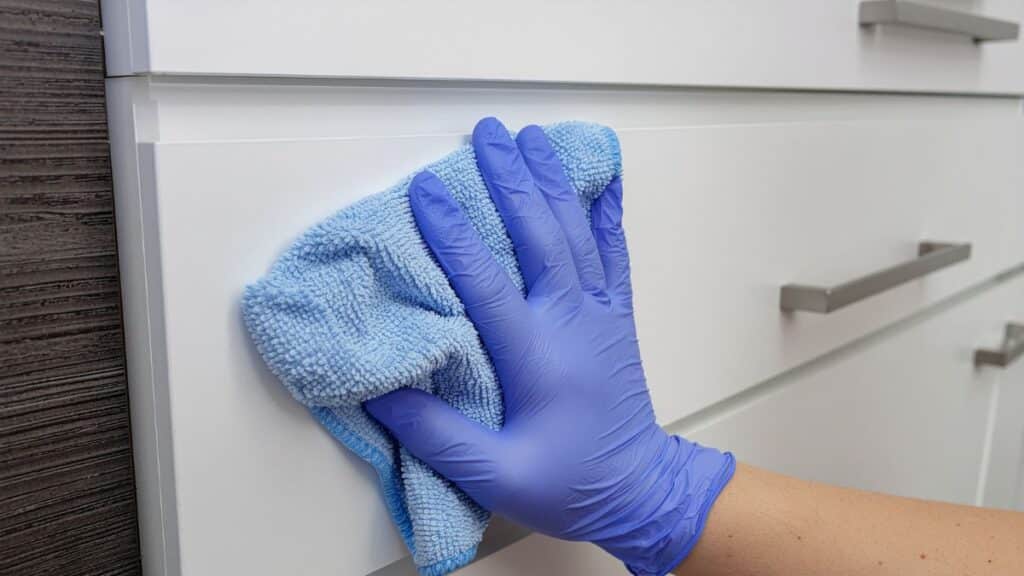
Avoid substituting dishwasher detergent, even the best sustainable dishwasher detergent options. These products are not calibrated for coated wood surfaces and may create more refinishing work than they save.
Step 3: Rinse Thoroughly and Dry to Protect the Finish
After lifting grease, wipe with a separate cloth dampened in clean water. This step removes soap and suspended residue. Skipping it often leads to a surface that still feels slightly tacky.
Dry each section immediately with a clean towel. Moisture left along seams can migrate into substrate materials, particularly MDF or particleboard, which are common in modern cabinetry.
Inspect the surface under angled light. An even sheen and consistent color indicate complete grease removal. If streaks remain, repeat a light cleaning pass rather than increasing chemical strength.
For natural wood cabinets, a light application of a cabinet-safe conditioner can help restore uniform appearance once the surface is fully clean. Conditioning should never be used to mask remaining grease.
Mistakes That Can Damage Cabinets
Abrasive pads and steel wool create micro-scratches that permanently alter finish reflectivity. Damage may not be obvious when wet but becomes visible once dry.
Oversaturation is a frequent cause of long-term cabinet deterioration. Water intrusion into joints leads to swelling that cannot be reversed. Many cabinet replacements attributed to “age” are actually moisture-related.
Heavy reliance on vinegar can gradually reduce sheen on painted finishes. While diluted vinegar has limited use, it is not a comprehensive degreasing solution.
Spraying cleaner directly onto cabinet faces increases the likelihood of liquid entering hinge mortises and panel joints. Applying cleaner to a cloth provides better control.
Ignoring ventilation allows grease to return. If hood filters are clogged or airflow is weak, new buildup begins immediately after cleaning.
Safety Practices and Compliance Considerations
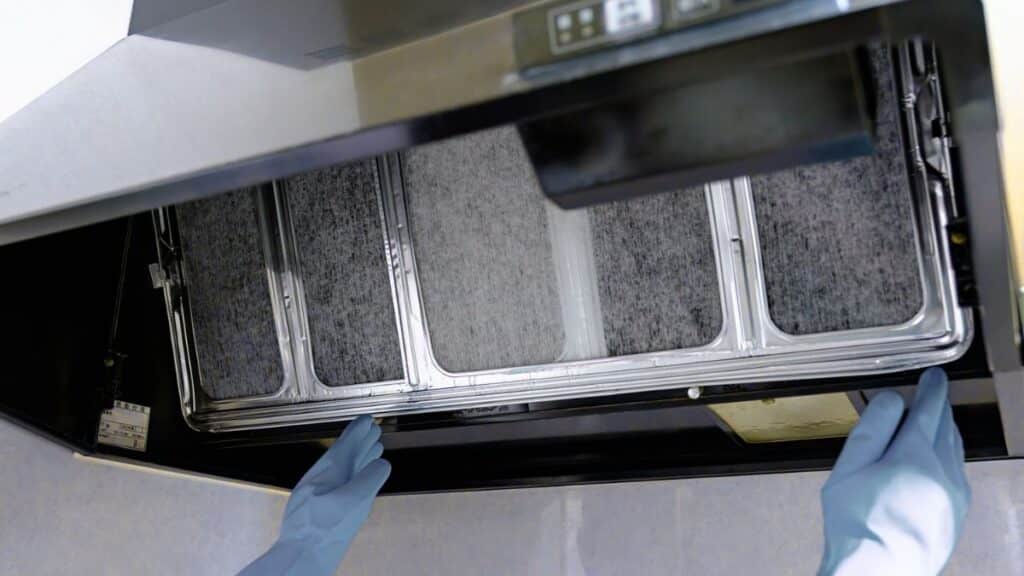
Grease accumulation near cooking surfaces presents fire risk. Residential building codes require mechanical ventilation in kitchens for this reason. If the range hood is ineffective, cabinet cleaning becomes a temporary fix rather than a long-term solution.
Clean or replace hood filters during the cabinet cleaning process. Many homeowners use dishwashers for metal filters. When doing so, selecting non phosphate dishwasher detergent aligns with phosphate restrictions in many states. Best eco friendly dishwasher tablets and the most environmentally friendly dishwasher detergent products can reduce environmental impact while still addressing grease effectively in the dishwasher.
Ensure adequate ventilation while cleaning. Open windows or run the exhaust fan. Never mix cleaning chemicals.
Turn off under-cabinet lighting before cleaning near fixtures. Avoid allowing liquid to contact electrical outlets.
In homes built before 1978, sanding deteriorated painted cabinets may involve EPA Renovation, Repair and Painting requirements related to lead. Cleaning does not typically trigger these rules, but surface disturbance can.
Use stable step stools and avoid overreaching. Falls during routine maintenance are more common than chemical-related injuries.
Frequently Asked Questions
What dissolves old sticky grease on kitchen cabinets?
A diluted grease-cutting dish soap solution removes most buildup. For heavier accumulation, a properly diluted cabinet-safe degreaser with controlled dwell time is more effective than stronger household chemicals.
Can I use Dawn to clean greasy cabinets?
Yes, when diluted. It is formulated to cut grease. Rinse thoroughly to prevent residue.
Is vinegar safe on painted cabinets?
Diluted vinegar may remove light grease but can dull certain finishes over time. It is best reserved for limited use.
How often should cabinets be deep cleaned?
Once or twice per year is typical. Kitchens with frequent frying or high heat output may require more frequent cleaning near the range.
Can I use dishwasher detergent to clean cabinets?
It is not advisable. Dishwasher detergents are highly alkaline and designed for heated wash cycles. Even the most environmentally friendly dishwasher detergent formulations are not intended for finished cabinetry.
Are eco-friendly dishwasher detergents effective for grease?
Yes for dishwashers, particularly when cleaning hood filters. For cabinets, use cleaners designed specifically for coated surfaces.
Maintenance Advice and When Professional Service Is Necessary
If cleaning reveals peeling paint, soft finishes, swollen seams, or delaminating thermofoil, the issue extends beyond surface grease. Continued scrubbing will not correct structural or coating failure.
Thermofoil doors lifting at edges typically require replacement. Swollen MDF panels rarely return to original dimensions once damaged.
In rental properties with severe buildup across multiple units, professional cleaning may offer consistent results and reduced turnaround time. Professionals also manage moisture exposure more precisely during large-scale work.
For ongoing maintenance, wipe cabinet faces monthly in high-use zones and clean hood filters regularly. Addressing grease at its source is more efficient than repeated heavy cleaning.
When cleaning is performed with controlled moisture, appropriate chemistry, and patience, even years of grease can be removed without compromising the integrity of the cabinetry.