 Introduction
 Introduction
A stainless steel stove hood does more than complete the look of your kitchen. It captures heat, smoke, and airborne grease before they settle on cabinets and ceilings. Over time, however, that same grease builds up on the hood itself.
If you are dealing with a sticky film, streaks that will not wipe away, or filters coated in residue, you are not alone. This guide walks you through how to remove grease from a stainless steel stove hood safely and effectively.
At a basic level, the process involves disconnecting power, removing and soaking the metal filters in hot degreasing solution, cleaning the stainless surface in the direction of the grain, and drying everything thoroughly before reassembly. Done correctly, this restores airflow, protects the finish, and reduces fire risk.
The steps below explain how to do it properly and why each step matters.
What to Understand Before You Begin
Not all range hoods accumulate grease the same way. An under-cabinet hood above a standard electric range typically sees lighter buildup than a high-capacity hood installed over a high-BTU gas cooktop. If you regularly sear, fry, or cook with oil at high temperatures, expect heavier residue and plan to clean more often.
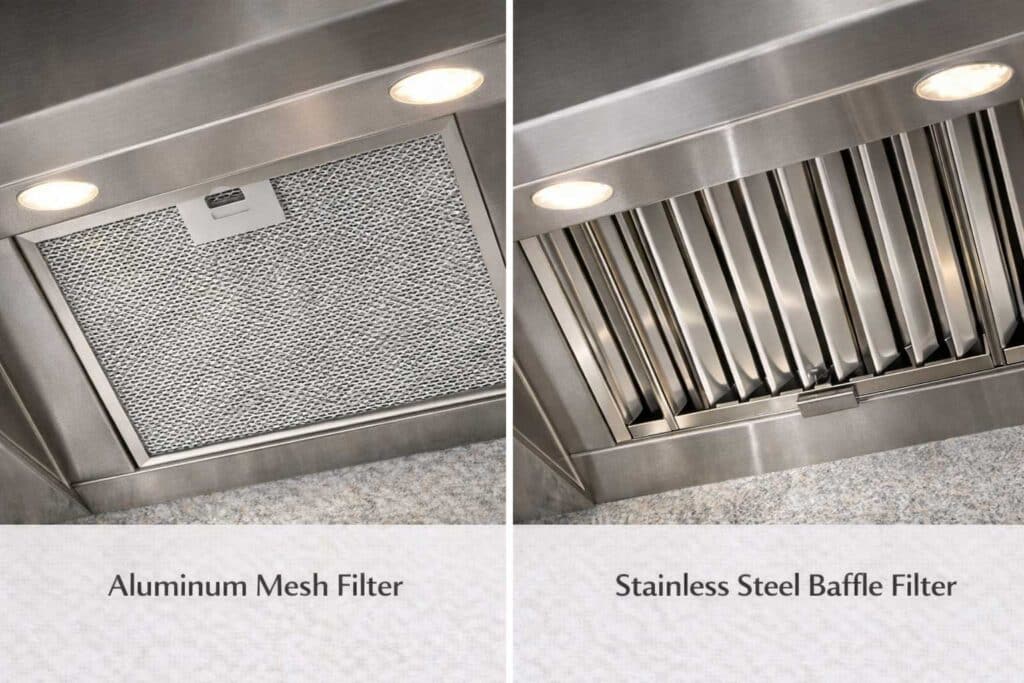
Start by identifying your filter type. Most residential hoods use aluminum mesh or stainless steel baffle filters. These are washable and meant to be cleaned regularly. Ductless models also include charcoal filters designed to absorb odors. Charcoal filters are not washable and must be replaced on schedule.
Next, look closely at the stainless steel surface. Most finishes are brushed, meaning they have a visible grain. Cleaning across that grain can leave faint scratches that show under kitchen lighting. Wiping with the grain helps preserve the factory finish.
Finally, evaluate how severe the buildup is. A light surface film usually comes off with mild detergent. Thick, sticky deposits, especially near the fan intake and along seams, require more dwell time and patience. Choosing the right approach prevents unnecessary damage from aggressive scrubbing.
Required Tools and Cleaning Supplies
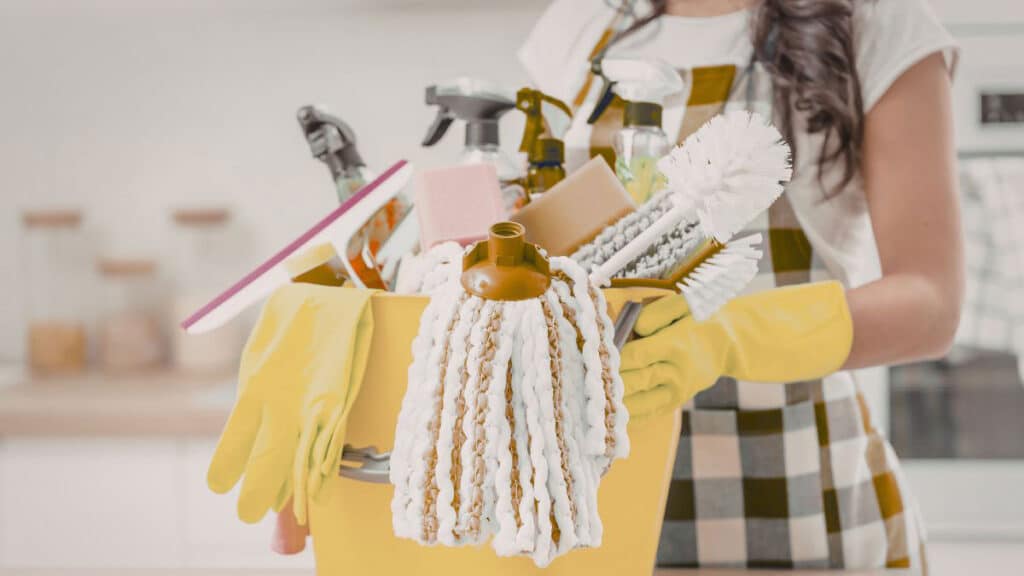
You do not need specialized equipment for routine maintenance. In most homes, the right combination of heat, detergent, and time does the work.
Microfiber cloths are preferred because they lift grease without scratching. Paper towels can leave lint behind and often require more pressure. Avoid steel wool or abrasive pads. Even minor scratches become visible on brushed stainless steel.
A grease-cutting dish detergent and hot water will handle most residue. Baking soda can help with heavier buildup because it increases alkalinity, which helps break down fatty compounds. If you use a commercial stainless steel cleaner, choose one labeled safe for appliances and free of chlorides.
For filters, use a sink or utility tub large enough for full submersion. A soft-bristle brush helps reach inside mesh layers or between baffle channels without bending them. Keep towels nearby to protect the cooktop from drips during filter removal. If you use a stronger degreaser, wear gloves and follow the label instructions.
Step-by-Step Cleaning Process
Step 1: Turn Off Power and Set Up the Work Area
Before cleaning, turn off the hood and lights. If you plan to clean near internal components, switch off the breaker. This reduces electrical risk, especially in hardwired units. Moisture and electrical components should not mix.
Place a towel over the cooktop. When filters are removed, grease often drips from the frame. Protecting the surface prevents extra cleanup and reduces the chance of staining on delicate surfaces.
Remove the metal filters carefully. Most slide out using a latch system. Support the filter with one hand as you release it to prevent dropping it onto the cooktop. Avoid spraying cleaner directly into the fan opening. Liquids can migrate into electrical compartments and contribute to corrosion or motor issues.
Step 2: Degrease and Clean the Range Hood Filters
If you are looking for a reliable way to clean grease off range hood filters, focus on heat and soak time. Fill your sink with very hot water and mix in a generous amount of grease-cutting detergent. Submerge the filters completely.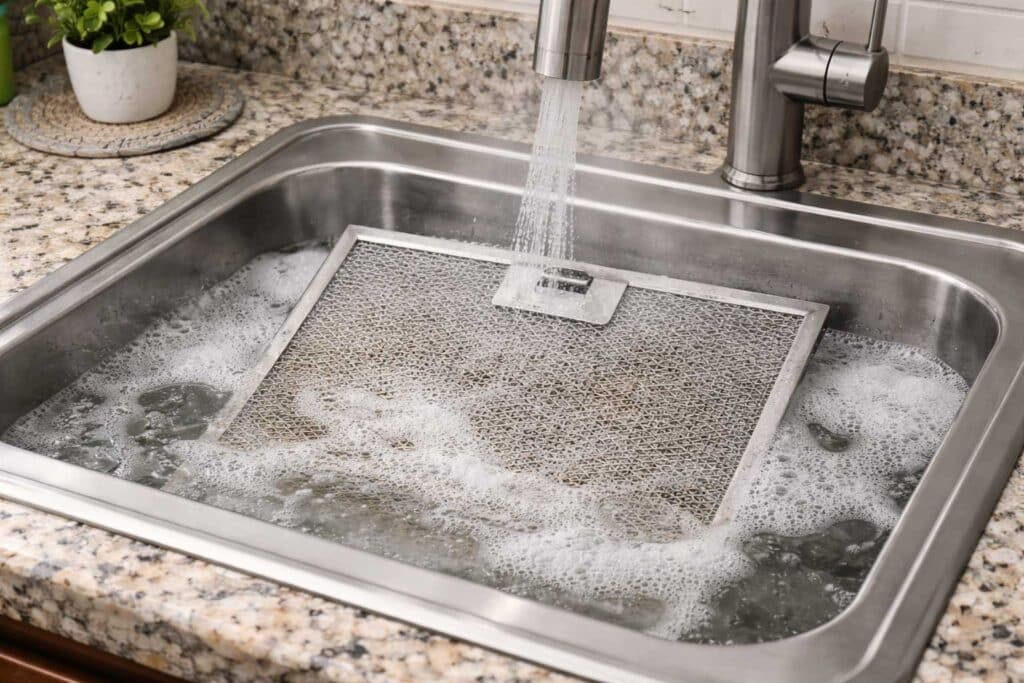
For moderate to heavy buildup, add several tablespoons of baking soda. The alkaline solution helps loosen hardened grease. Allow the filters to soak for 15 to 30 minutes. In rental properties where cleaning has been delayed, soaking time may need to be extended.
After soaking, scrub gently with a soft-bristle brush. Pay attention to corners and edges where grease collects. Avoid bending aluminum mesh filters, as distortion can reduce airflow efficiency. Rinse thoroughly with hot water and allow the filters to dry completely before reinstalling.
If your hood uses charcoal filters, replace them according to manufacturer recommendations. Washing charcoal filters reduces their ability to absorb odors and can restrict airflow.
Step 3: Clean and Restore the Stainless Steel Hood Surface
To remove grease from a stainless steel cooker hood, start with warm water and mild detergent. Dampen a microfiber cloth and wipe in the direction of the grain. This helps reduce streaking and protects the finish.
For stubborn residue, apply a baking soda paste and let it sit briefly to soften the grease. Then wipe gently with the grain using a non-abrasive sponge. Avoid circular scrubbing motions, which can create uneven patterns on brushed surfaces.
If you need more cleaning power, apply a small amount of stainless steel cleaner to the cloth rather than spraying it onto the hood. This limits overspray and keeps moisture away from electrical components. After grease removal, wipe the surface with a clean damp cloth to remove residue, then dry immediately with a separate microfiber cloth to prevent water spots.
Avoid chlorine bleach, oven cleaners, or abrasive powders. These products can permanently damage stainless steel finishes and cause pitting or discoloration.
Cleaning Errors That Can Damage Your Hood
The most common mistake is using abrasive materials. Even light scouring can leave fine scratches that catch light and make the hood look dull. Cleaning against the grain produces streaks and haze that are difficult to correct without refinishing.
Another frequent issue is neglecting filters for extended periods. When airflow becomes restricted, grease stays suspended longer and deposits inside the hood canopy and ductwork. That increases cleaning difficulty and raises fire risk. Reinstalling metal filters while wet can also introduce moisture into the housing and accelerate corrosion.
Finally, do not spray degreasers directly into intake openings or light housings. Overspray can reach wiring and switches, creating avoidable electrical problems.
Safety Precautions and Residential Code Considerations
 Disconnect power before cleaning anywhere near internal components. This is especially important for hardwired installations. Use cleaners sparingly around seams, control panels, and intake openings to avoid introducing moisture into electrical areas.
Grease is flammable. Excessive accumulation inside the hood canopy or duct increases ignition risk during high-heat cooking. Cleaning filters and accessible surfaces reduces that hazard and helps the hood perform as intended.
In most U.S. jurisdictions, ducted range hoods must vent to the exterior. Venting into attics, crawlspaces, or wall cavities can deposit grease and moisture in concealed spaces. Ductwork should typically be smooth metal rather than flexible plastic or foil, because corrugated materials trap grease and reduce airflow.
If your hood is rated at 400 CFM or higher, some areas require make-up air provisions to balance indoor pressure. Cleaning improves performance but does not replace proper ventilation design or code-compliant installation.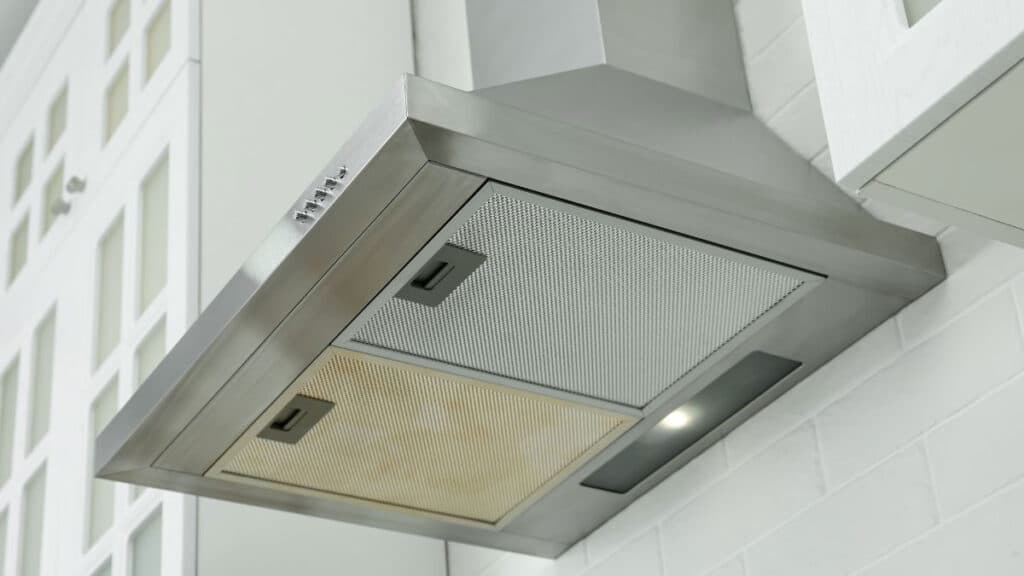
Frequently Asked Questions About Stove Hood Cleaning
How often should a stainless steel stove hood be cleaned?
For average households, wipe the exterior monthly and clean metal filters every 1 to 3 months. Heavy cooking, frequent frying, or high-BTU gas ranges may require more frequent filter cleaning.
Can vinegar be used on stainless steel cooker hoods?
Diluted vinegar can cut grease, but it should not remain on the surface for extended periods. Rinse and dry promptly to reduce the chance of dulling or spotting.
Are range hood filters dishwasher safe?
Some metal filters are dishwasher safe, but confirm in the owner’s manual. Avoid high-heat drying cycles that may warp aluminum. If dishwasher cleaning leaves discoloration, return to hand-washing and soaking.
How do you remove baked-on grease from stainless steel?
Use a baking soda paste or a manufacturer-approved degreaser. Give the solution time to soften the grease, then wipe gently with the grain using a non-abrasive sponge.
Why does my hood still smell after cleaning?
Odors often come from saturated charcoal filters, grease inside the blower housing, or buildup in ductwork. Replacing charcoal filters and addressing internal buildup typically resolves persistent smells.
When should filters be replaced instead of cleaned?
Replace metal filters if they are bent, corroded, or no longer hold their shape. Replace charcoal filters on schedule as directed by the manufacturer.
Maintenance Advice and Situations That Require a Professional
Routine cleaning addresses most homeowner needs. However, if airflow remains weak after filter cleaning, internal components may be coated with grease and require professional service. This is more common in heavy-use kitchens and in homes with long duct runs and multiple elbows.
Grease visible inside ductwork or dripping from the exterior vent cap indicates deeper accumulation. Duct inspection and cleaning is a specialized task and is often best handled by a qualified technician. Electrical issues, such as flickering lights or inconsistent fan speeds, also warrant professional diagnosis.
For high-output kitchens with powerful gas ranges and high-capacity hoods, consider an annual inspection of internal components. Consistent maintenance supports proper ventilation, helps protect cabinetry, and reduces fire risk while extending the hood’s service life.